在Ubuntu下安装MySQL
MySQL是一个开放源代码的关系数据库管理系统,性能高、成本低、可靠性好,已经成为最流行的开源数据库。
安装MySQL
sudo apt-get install mysql-server mysql-client
安装过程中会要求输入root用户的密码,记下自己输入的密码即可
更改默认端口
mysql默认的端口是3306,一般情况下我们会更改默认端口,当你数据库暴露在外网时可以一定程度上防止攻击
编辑目录 /etc/mysql/mysql.conf.d/mysqld.cnf 下mysql的配置文件:
sudo vim /etc/mysql/mysql.conf.d/mysqld.cnf

# * Basic Settings
user            = mysql
pid-file        = /var/run/mysqld/mysqld.pid
socket          = /var/run/mysqld/mysqld.sock
port            = 7777   #修改自己需要的端口
basedir         = /usr
datadir         = /var/lib/mysql
tmpdir          = /tmp
lc-messages-dir = /usr/share/mysql
skip-external-locking
这里演示把默认端口修改为7777,保存修改,重启mysql即可
sudo service mysql restart
重启之后,通过netstat命令查询端口来验证是否修改成功
sudo netstat -nltp|grep 7777
tcp        0      0 0.0.0.0:7777            0.0.0.0:*               LISTEN      226042/mysqld
授权可以访问的客户端
默认情况下,mysql只允许本地操作,如果我们的mysql安装在服务器上,避免不了远程连接,为了方便,这里我允许所有ip远程操作mysql
首先登录到mysql,授权root用户可以从任意ip获得所有特权
mysql -uroot -p
Enter password:

mysql> grant all privileges on *.* to 'root'@'%' identified by '你的密码';
mysql> flush privileges;
mysql> exit;
ps:为了安全,你可以指定ip和操作权限
然后,更改mysql配置文件允许从任意ip连接
sudo vim /etc/mysql/mysql.conf.d/mysqld.cnf

#
# Instead of skip-networking the default is now to listen only on
# localhost which is more compatible and is not less secure.
bind-address            = 0.0.0.0  #把127.0.0.1修改为0.0.0.0即可

sudo service mysql restart
把127.0.0.1修改为0.0.0.0即可,然后保存修改,重启mysql生效
开启日志
mysql有一个二进制操作日志(Binary Logging),包含描述数据库更改的“事件”,例如表创建操作或对表数据的更改。
这个日志可以在一定程度上恢复数据,参考 在ubuntu下使用mysqlbinlog恢复drop后的数据 了解如何通过日志恢复误删的数据。
默认情况下,日志功能是关闭的,我们需要手动配置
编辑目录 /etc/mysql/mysql.conf.d/mysqld.cnf 下mysql的配置文件:
sudo vim /etc/mysql/mysql.conf.d/mysqld.cnf

# The following can be used as easy to replay backup logs or for replication.
# note: if you are setting up a replication slave, see README.Debian about
#       other settings you may need to change.
server-id               = 1
log_bin                 = /var/log/mysql/mysql-bin.log
expire_logs_days        = 10
max_binlog_size   = 100M
去掉 server-id 和 log_bin 前面的注释,保存重启mysql服务即可开启日志记录功能
在console中使用mysql
检测是否可以正常使用mysql,打开命令行,使用root用户和刚刚输入的密码连接到mysql
thxopen@Thxopen:~$ mysql -uroot -p
Enter password:

Welcome to the MySQL monitor.  Commands end with ; or \g.
Your MySQL connection id is 6
Server version: 5.7.22-0ubuntu0.16.04.1 (Ubuntu)

Copyright (c) 2000, 2018, Oracle and/or its affiliates. All rights reserved.

Oracle is a registered trademark of Oracle Corporation and/or its
affiliates. Other names may be trademarks of their respective
owners.

Type 'help;' or '\h' for help. Type '\c' to clear the current input statement.

mysql>
出现上述代表mysql安装成功,可以正常使用
使用MySQL Workbench操作mysql数据
MySQL Workbench 是一个可视化的,可以对mysql配置、用户管理、备份、数据建模、SQL开发等进行操作的综合管理工具。 支持在Windows, Linux 和 Mac OS X上使用。
在官网上下载对应平台的安装包,安装即可使用。
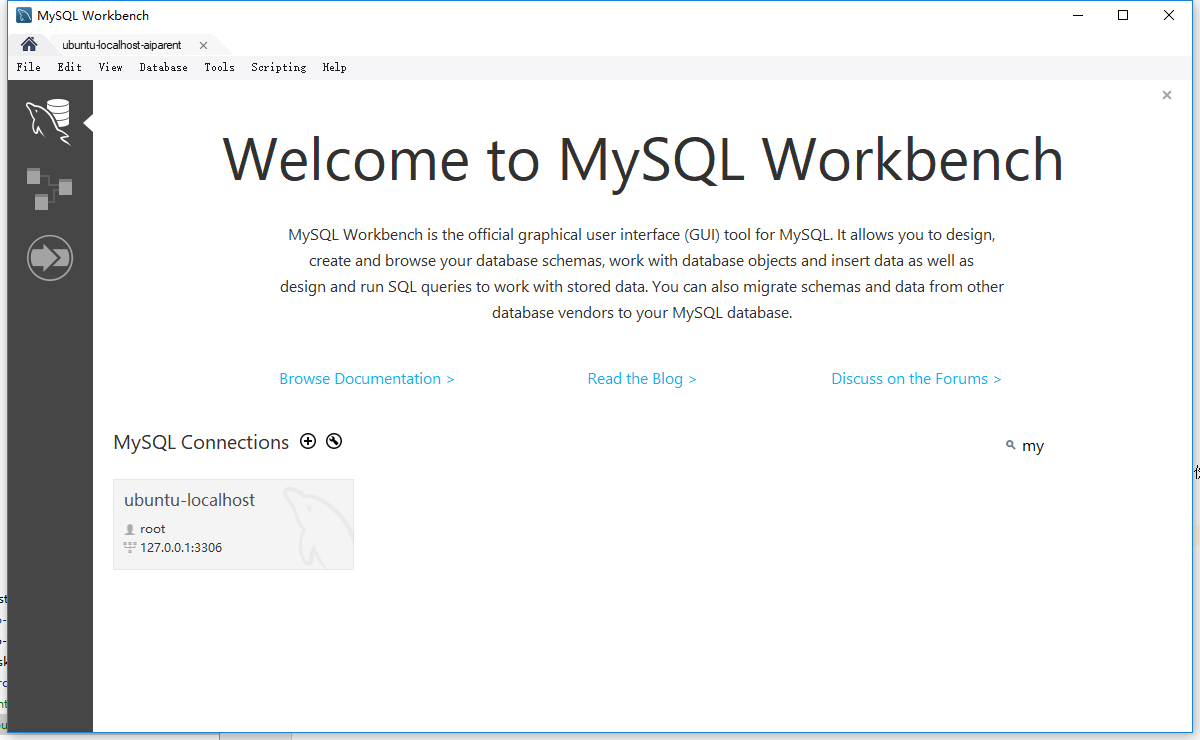
工具欢迎面如下图所示:

界面看起来比较清爽,简洁,但是功能非常强大。
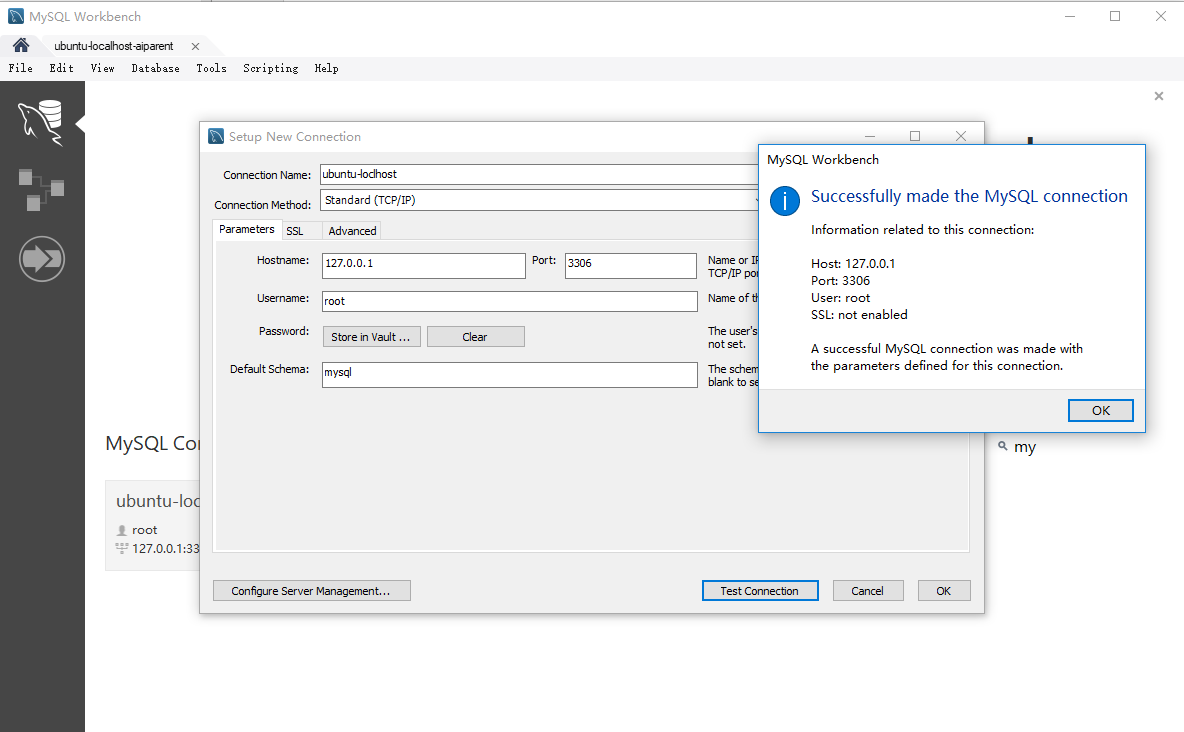
可以通过【加号】按钮新建一个mysql连接,如下图所示:

输入mysql服务器地址、端口、密码,点击【Test Connection】检查是否连接成功。
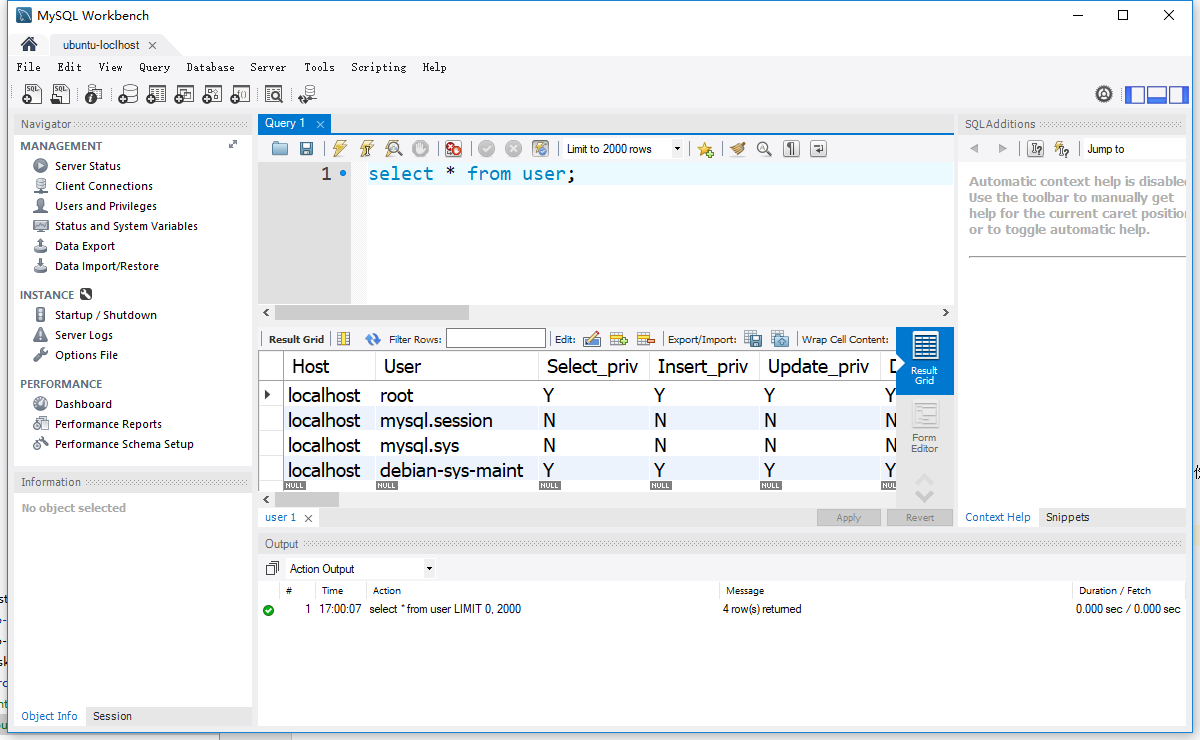
进入MySQL Workbench主界面,如下图所示:

主要关注的是中间部分,分别有sql脚本输入区域,表格数据显示区域,历史脚本显示区域
整体来说MySQL Workbench还是一个不错的可视化的工具,官方出品,推荐一下。
Reference
- http://www.jianshu.com/p/3111290b87f4
